Home Audio on a Budget: Digitally Controlled Waves™
The “Remote” Problem
In Part 1, I put together a decent budget audio setup: Sony STR-DE495 receiver, DVP-NS330 DVD player, and a salvaged remote subwoofer with some tweaks. It sounded good, cost almost nothing, and worked fine.
Except there were no remotes.
Buying original Sony remotes would’ve been the boring, logical solution. They also cost money. But getting up to manually adjust volume or switch inputs requires physical movement, which is strictly against my religion (although I enjoy the gym, the universe works in mysterious ways).
So naturally I decided the correct response was to build a web interface that could control the receiver, the DVD player, and physically wake the subwoofer from standby. as one does with +inf free time.
The Testing Apparatus and c.o.
The Brain
Raspberry Pi Pico W. It’s like $6, has WiFi built in, and enough GPIO pins for whatever stupid idea you have. Perfect.
The IR Transmitter
I used an Iduino ST1087 IR transmitter module. It’s a 940nm IR LED with a transistor already built into the board, so you don’t need to wire up your own driver circuit. Just connect it to a GPIO pin and it works.
Subwoofer Improvements v2
This is where it got interesting. or annoying, depending on your perspective. The subwoofer’s amplifier has a standby pin that controls power. Pull it high (5V) and the amp turns on. Pull it low and it sleeps.
Problem: The Pico speaks in 3.3V logic. The amp is deaf unless you touch it with a solid 5V stick.
Solution: A double NPN inverter circuit with two BC547 transistors that I found at the bottom of a drawer.
Why double? Because a single NPN inverts the logic (HIGH becomes LOW), and I didn’t want to explain to my future self why turning the “ON” switch in the UI turned the speakers off. I inverted the inversion. It’s stupid, but it shifts the voltage correctly.
Well, I could have just make it so pico tracks the states and inverts everything…
I also jammed a manual volume pot between the RCA input and the amp board because sometimes software volume control isn’t enough and you just need to choke the signal manually.
Here’s the testing apparatus:
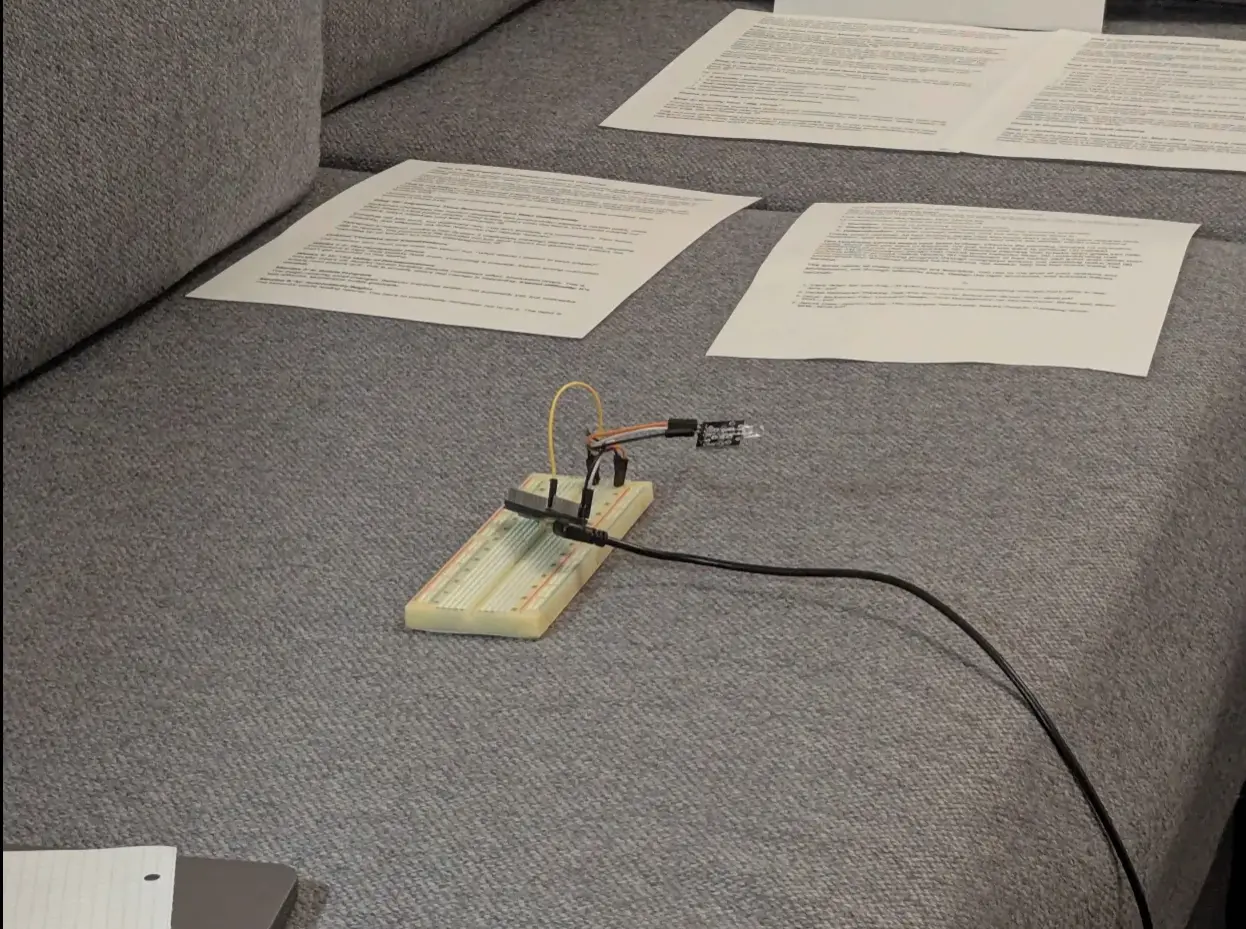
apparatus
peak engineering right here.
Decoding Sony SIRC + Python Backend
Sony uses SIRC (Sony Infrared Remote Control) for their stuff. It’s documented, but standard IR libraries don’t include device codes for every piece of damn hardware dating back to the martial law in Poland (or Reagan administration idk).
I needed the “magic numbers” - the specific device ID bit sequences to address the DVD player separately from the receiver. This took around ~ two days of trial and error. The device addressing system is weird. I ended up using device code 48 for the receiver, and 26.73 (device.extended format) for the DVD player.
For the backend, I wrote a MicroPython server using asyncio. Why asyncio? Because:
- Non-blocking web requests
- IR timing is microsecond-precise and if the Python garbage collector runs while I’m blasting bits, the receiver ignores me.
The server runs on the Pico W, listens for HTTP requests, and translates them into IR pulses.
I could have used something already, made but oh well, too late.
Custom Binary Protocol
Most people would use JSON:
{"device": "receiver", "command": "volume_up"}
That’s sensible. Human-readable, easy to debug, works fine.
I didn’t do that…..
I made a custom binary protocol. Why?
- Efficiency: binary packets are smaller
- Performance: parsing integers in MicroPython is faster than string parsing, which matters on a microcontroller
- It’s fun: sometimes you do things because they’re interesting, not practical
okay it was mainly for performance. MicroPython is not fast. Also latency is pretty important when working with volume and stuff
Packet Structure
Every command packet starts with a 3-byte header: [69, 42, 213]
69 and 42 are there for… cultural reasons. Together they form a magic signature.
After the header: alternating device ID (1 byte) and command code (2 bytes, little-endian) for each IR command.
Here’s the Python that unpacks these:
def v1_execute(data: bytes):
    # ...

    data = raw_request[body_start + 4 :]

    if len(data) < 3:
        res("400 Bad Request", "")
        return

    if data[0] != 69 or data[1] != 42 or data[2] != 213:
        res("400 Bad Request", "")
        return

    pos = 3
    row_size = 3
    data_len = len(data)
    device_count = len(DEVICES)

    # Batch commands for same device
    commands = {}

    while pos + row_size <= data_len:
        device_id = data[pos]
        value = data[pos + 1] | (data[pos + 2] << 8)

        if device_id >= device_count:
            res("400 Bad Request", "")
            return

        if device_id not in commands:
            commands[device_id] = []
        commands[device_id].append(value)

        pos += row_size

    # Execute in batches (if your device supports it)
    for device_id, values in commands.items():
        for value in values:
            DEVICES[device_id].execute((value, ""))

    # ...
Verifies the magic header, loops through command triplets, unpacks device ID and 16-bit command, fires IR. nothing fancy, it just works.
The Frontend
For the web interface, I wanted something that doesn’t look like garbage but also doesn’t require me to set up webpack (I ended up using Vite anyway, so I could use TypeScript). Shoelace gave me web components that look decent and work without a build step. good enough.
Generating the packets wasn’t that hard, fortunately:
export function buildPacket(header: [number, number, number], rows: ExecutableCommand[]) {
    const totalSize = 3 + rows.length * 3;
    const buffer = new ArrayBuffer(totalSize);
    const view = new DataView(buffer);

    let offset = 0;

    // Header: <u8><u8><u8>
    for (let i = 0; i < 3; i++) {
        view.setUint8(offset++, header[i]);
    }

    // Rows: <u8><u16> little-endian
    for (const [byteVal, uint16Val] of rows) {
        view.setUint8(offset++, byteVal);
        view.setUint16(offset, uint16Val, true); // little-endian
        offset += 2;
    }

    return buffer;
}

export async function sendExecutePacket(header: [number, number, number], rows: ExecutableCommand[]) {
    const packet = buildPacket(header, rows);

    try {
        const res = await fetch(`${API_BASE}/execute`, {
            method: "POST",
            headers: {
                "Content-Type": "text/plain"
            },
            body: packet
        });

        if (!res.ok) {
            throw new Error(`HTTP ${res.status} - ${res.statusText}`);
        }

        return await res.text(); // fallback
    } catch (err) {
        console.error("POST /execute failed:", err);
        throw err;
    }
}
DataView handles the low-level byte stuff, including little-endian formatting for the 16-bit commands.
Here’s the interface:
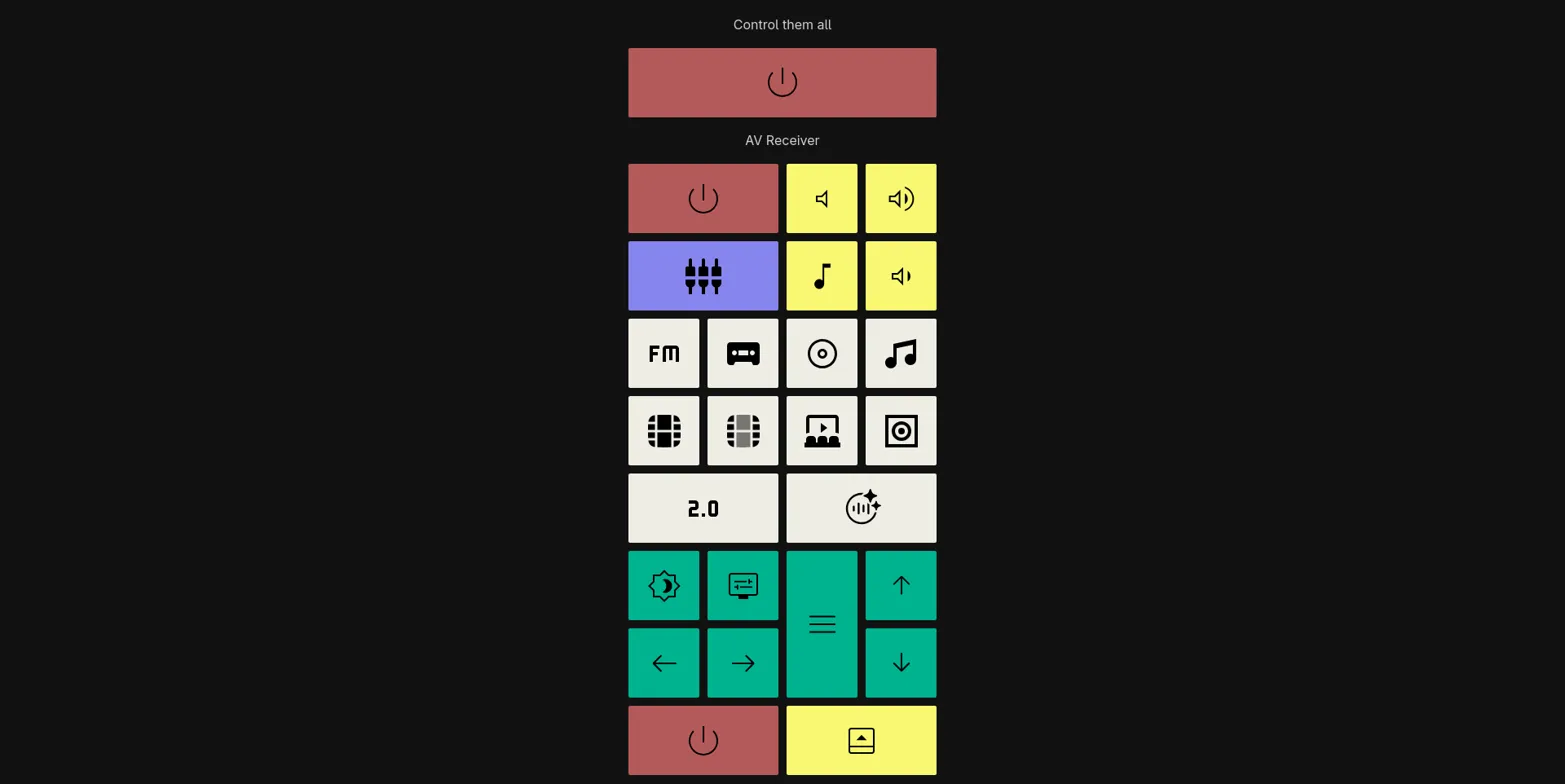
Main screen interface with everything needed
Organized into sections: power (red), volume (yellow), input selection (white), navigation (cyan). Each button sends its binary packet to the Pico.
There’s also an editing mode:
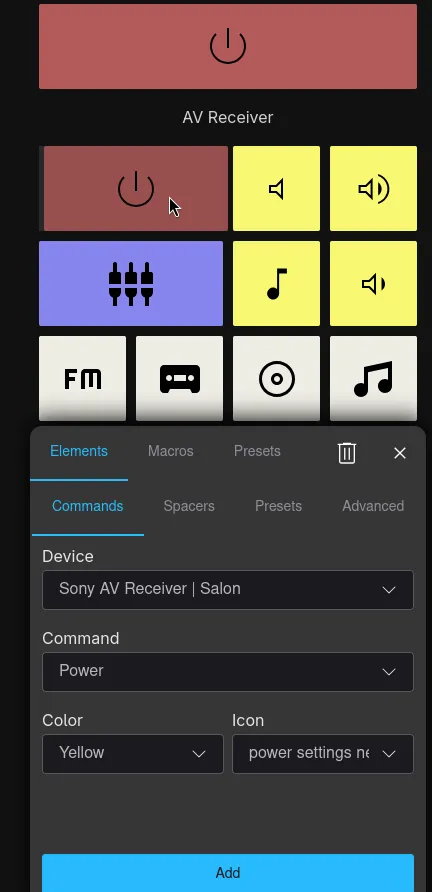
Edit mode with dragging and resizing of the tiles!
Features That Make It Worth It
Beyond basic buttons:
Macros: “Watch Mode” executes a sequence, turn switch input to DVD, wake subwoofer, power on DVD player. One button, complete setup.
Subwoofer Toggle: dedicated button for the GPIO pin connected to that double inverter. click it, hear the relay click, feel the infinite power of electricity in your hands which allowed humans to make rock think.
Custom Layouts: editing mode lets you rearrange buttons, change colors, customize icons. spent way too long on this feature that I’ve used maybe twice.
The Finished Setup
The Pico is now permanently mounted to the back of the subwoofer. no more breadboard on couch. kind of miss that setup honestly, it had that character.
When I want to watch something, I pull out my phone, tap “Watch Mode”, and everything powers up in sequence. receiver clicks on, DVD player whirs to life, subwoofer relay clicks. no hunting for remotes, no walking across the room.
Could I have just bought original Sony remotes for $20 each? yeah. would that have been more practical? definitely. would I have spent two days figuring out IR protocols, built a uhhh transistor circuit, and written a custom binary protocol for a problem that JSON would’ve solved fine? no.
is it overkill? absolutely. does it work? yes. am I proud of it? …kind of?
Well, I am using still using it regularly. The final commit was made like 2 months ago, so win I guess?
Source code is on GitHub if you want to see how the sausage is made.
comments powered by DisqusP.S. I really should have included more sources that I used, but got lost while drafting this post. Next posts should be much more detailed overall, as I actually started documenting what I am doing in more or less real-time in docs
Expect increased quality!